Just as its name suggests, the Ease of Access menu attempts to make the Windows 10 system equally usable for all users. You can find the Ease of Access options from the Windows Settings page as well as the user account logon screen.
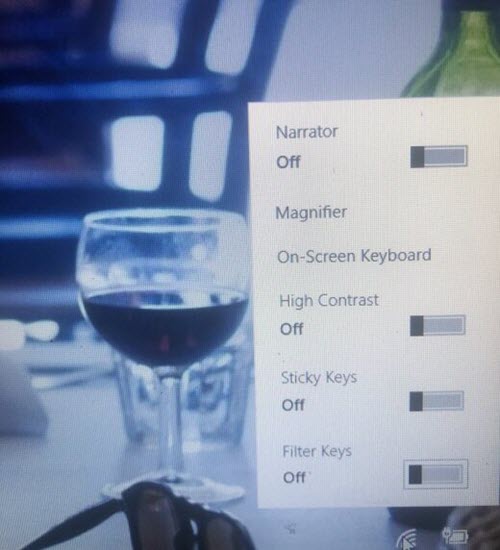
With Ease of Access options, you can:
- Magnify content displayed on your monitor.
- Enable or disable high-contrast mode.
- Toggle on/off Sticky Keys, Filter Keys, Toggle Keys, and the On-Screen Keyboard.
- Use your keyboard to control the mouse pointer.
- Modify the mouse pointer size, etc.
However, many Windows users can do without these settings. When your system is locked out, every user on the logon screen can modify these options from the Ease of Access button on the logon screen.
Therefore, people now wish to do away with the Ease of Access button, but they find it tricky. If you want to remove or disable the Ease of Access button from the Windows logon screen, you have to follow this guide closely.
Remove Ease of Access button from Logon screen
You can either take off the Ease of Access button or disable it so that the button is there but does nothing. Below are the ways to remove or bypass the Ease of Access button from the logon screen.
- Disable the Ease of Access button from the Windows Registry.
- Deactivate the Ease of Access button by disabling Utilman.ex.
- Remove the Ease of Access button by editing the XAML files.
Continue reading as I break down the above methods.
1] Disable the Ease of Access button from the Windows Registry
The following method works on Windows 10 Enterprise edition. The Windows Registry is delicate and crucial to the workings of your computer system. One mistake, and BOOM! You have bigger problems than disabling the Ease of Access button from your logon screen.
Therefore, before going any further, you have to back up your registry. Below is how to do this easily.
- Find the Computer icon on the top of the left-hand panel and click to select it.
- Right-click on the Computer icon and hit the Export option.
- Browse for a suitable location, preferably on an external drive.
- Give the file a memorable name and then hit Save.
Here’s how to disable or remove the Ease of Access button in the logon screen from the Windows Registry Editor:
Log in to your computer with an Administrator account.
Press the Windows key and search for Regedit. Right-click on Registry Editor and select Run as administrator. If Windows asks for your permission to allow the app to make changes to your device, hit the Yes button.
Navigate to the following Registry Location:
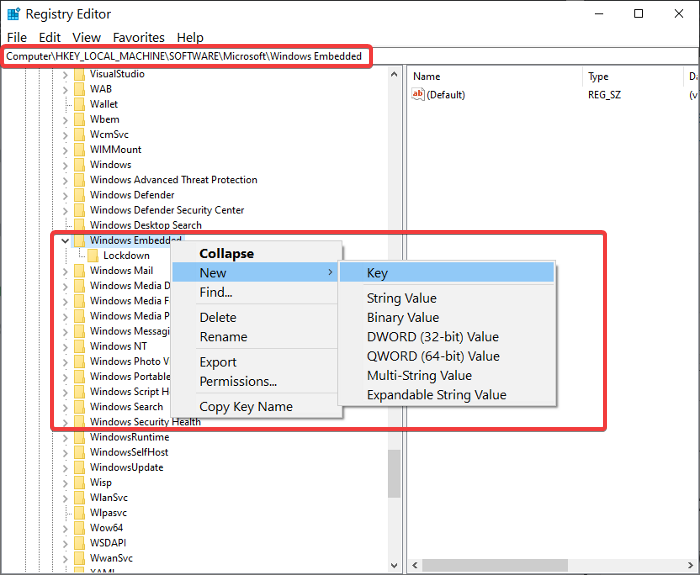
HKEY_LOCAL_MACHINE\SOFTWARE\Microsoft\Windows Embedded\EmbeddedLogon
NOTE: If you don’t find the EmbeddedLogon folder, create it by right-clicking on the Windows Embedded folder and going to New > Key.
Right-click on the EmbeddedLogon folder and go to New. Select DWORD(32bit Value).
Name this key BrandingNeutral and enter 8 in the field for Value data.
Hit OK to close the dialog box.
Exit the Registry Editor and reboot your computer.
2] Deactivate the Ease of Access button by disabling Utilman.exe
Another way to do away with the Ease of Access button from your logon screen is by disabling every user’s access to the Utilman.exe program. Unlike in the first method, this doesn’t get rid of the Ease of Access button but renders it useless.
When you power on your computer and get to the Windows logon screen, you will find the Ease of Access button there, but clicking it will do nothing. Keep reading for the steps to perform this operation.
Press the Windows key and search for cmd. Right-click on Command Prompt and click on Run as Administrator. In the Command Prompt window, enter the following command and hit ENTER to run it:
cacls %windir%\system32\utilman.exe /C /D Everyone
C:\Windows\System32
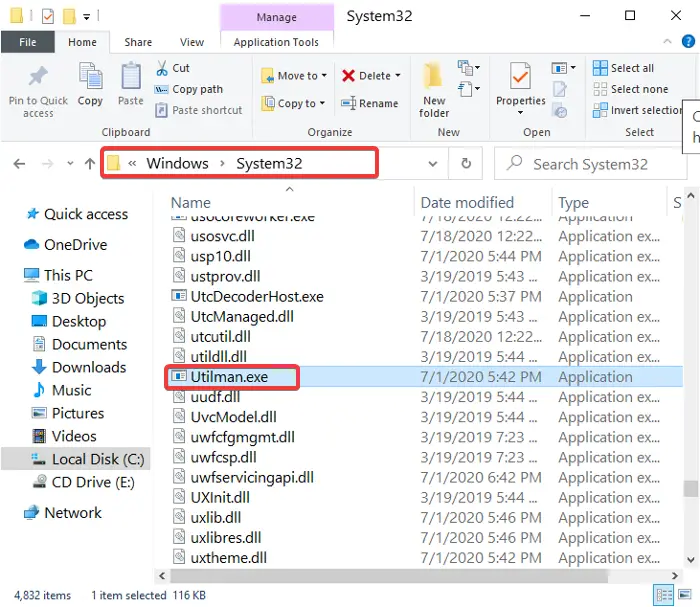
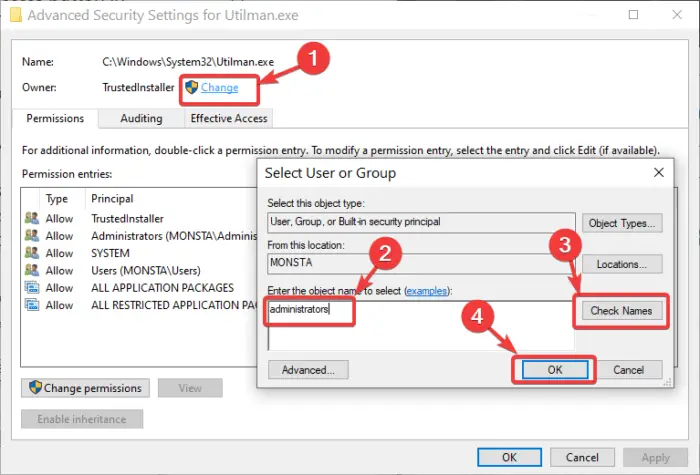
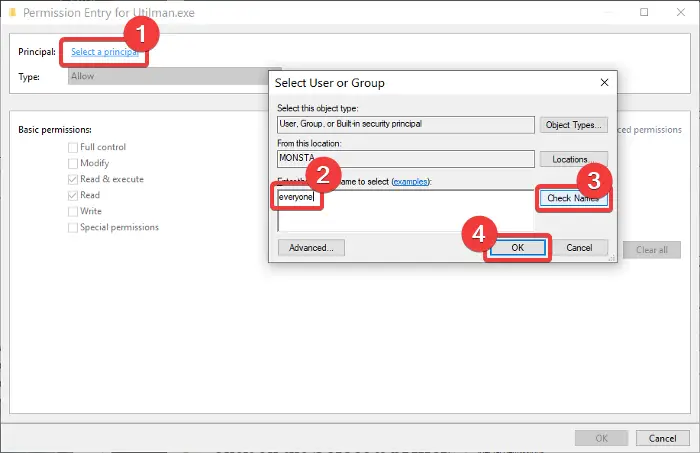
Click on the dialog box beside Type and change it from Allow to Deny and Full Control.
Hit the OK button.
If you wish to re-enable the Ease of Access button, later on, open Command Prompt as an Administrator and run the following command:
cacls %windir%system32\utilman.exe /E /G "Everyone":R
3] Remove the Ease of Access button by editing the XAML files
Launch Windows Explorer and navigate to the following directory:
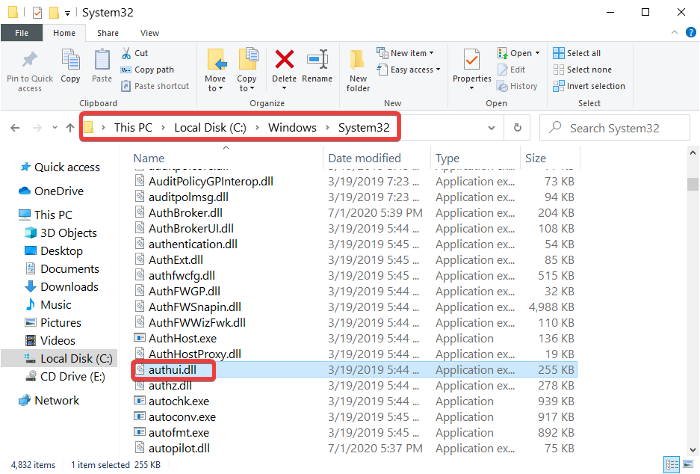
C:\Windows\System32
Find the Authui.dll file and open it in PE Explorer or another good resource editor.
Enter the UIFILE folder.
Double-click on the 12400 XAML file.
Press the CTRL + F combination to search for the following texts:
<if id="atom(Accessibility)">
and
<if id="atom(ToggleTabletKeyboard)">
Delete all the text between these two lines.
Save and close the modified file.
Repeat the above steps for the 12402 and 12401 XAML files.
These three methods will either help you remove the Ease of Access button. If they all don’t work, then you can try and replace the Ease of Access button with useful tools using our freeware Ease Of Access Replacer.
Read next: How to change Smart Card Logon to Password Logon in Windows.
