W have seen how to make Windows use Wired connection instead of wireless connection. In this post, we will see how to view & change Wireless Network Connection Priority in Windows 10/8 using CMD. Windows 11/10/8 does not have a Wireless Profile manager, which was available in Windows 7. Let us see how to change Wireless Network Connection Priority, natively using the command prompt.
Change Wireless Network Connection priority
Windows 7
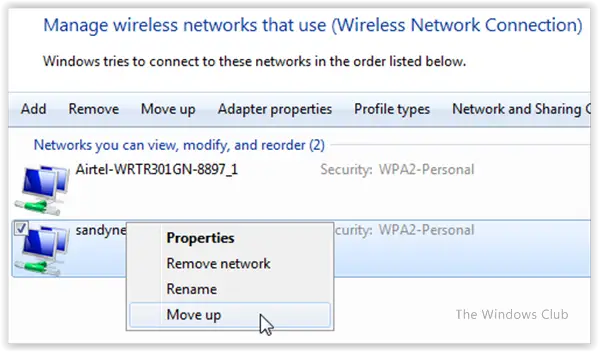
In Windows 7 you can open the Control Panel > Network& Sharing > Manage Wireless Networks. Once here, you will see all the WiFi networks.

Right-click on a network and you will see context menu options like Properties, Remove network, Rename, Move up or Move down. These options will help you manage your WiFi networks.
Windows 11, Windows 10, Windows 8.1, Windows 8, Windows 7
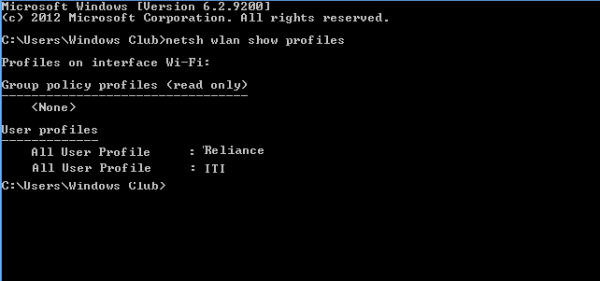
For checking the list of Wireless Networks, you connected to earlier and find out their priority, open a Command Prompt window. For this, open the WinX menu and click on Command Prompt. Next, run the command given below:
netsh wlan show profiles
There, you will see the priority of your wireless networks.
Maybe you would like to change it a bit. To do this, you will need to have information about the name of your interface (Wi-Fi as seen here), and the network name whose priority you would want to change.
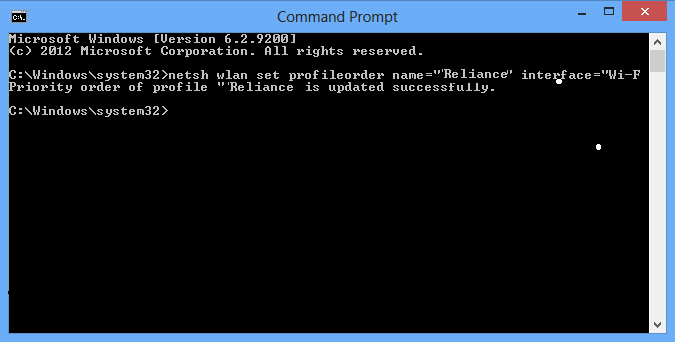
When all is in place, run the following command
netsh wlan set profileorder name= “Reliance” interface=”Wi-Fi” priority=1
Here replace Reliance with the name of your network, and Wi-Fi with the name of your network interface.

That’s it!
Now, when you go back and check your profiles, you will find that ‘Reliance’ has moved upwards.

You can always use our freeware WiFi Profile Manager, which tries to fill in this gap in Windows 10, to manage your WiFi profile.
I hope that helps!
