The System Restore feature is a very useful feature in the Windows operating system, and it can be a real life-saver at times. But if you, for some reason, find your System Restore not working in Windows 11/10 or Windows 8/7, and that (a) System Restore points are not being created, even automatically, (b) you are unable to create a system restore points manually or (c) your System Restore failed & did not complete successfully, and you are unable to restore your computer, here are a few troubleshooting steps you may want to try.

System Restore not working on Windows 11/10
While you may be unable to create a system restore points manually, it is quite possible however that the Automatic Restore Points may continue to get created, but you face the problem only when you try to create one manually.

The following Error Messages may also pop up:
- System Restore failed.
- System Restore did not complete successfully
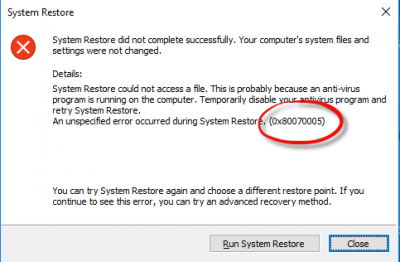
- Error 0x80070005: System Restore could not access the file. Temporary disable your antivirus program and try again.
- Error 0x800423F3: The writer experienced a transient error. If the backup process is retried, the error may not reoccur.
- A shadow copy could not be created for the following reason. The writer experienced a transient error (0x800423F3)
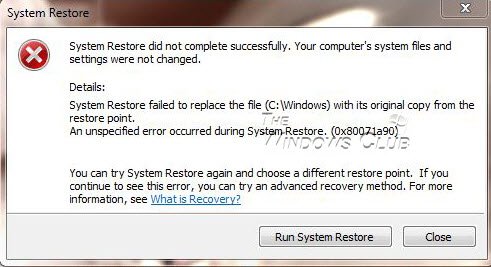
- System Restore did not complete successfully. Your computer’s system files and settings were not changed.
- Can’t system restore, file or directory is corrupted and unreadable (0x80070570)
- System Restore failed to extract the original copy of the directory from the restore point.
- A restore point could not be created for this reason: Error detected in the Volume Shadow Copy Services (VSS).
Related: Rstrui.exe not working or recognized.
System Restore did not complete successfully

In any case, you may try one or more of the steps, in no particular order, and see if something helps you.
- Manually create a system restore point
- Disable security software temporarily
- Boot into Safe Mode and create it
- Run System File Checker
- Repair system image
- Run ChkDsk
- Ensure that that System Restore is enabled
- Check available disk space
- Check status of Services
- Check Event Logs
- Consult your administrator
- Reset the Repository.
1. Manually create a system restore point
Try to create a System Restore point manually and make a note of the Error Message you get. If you don’t get one, check if one has been created or not.
2. Disable security software temporarily
Disable your antivirus or security software and then try to create a system restore point.
3. Boot into Safe Mode and create it
Boot into Safe Mode and see if you create a system restore point or restore to a prior restore point. Many times, non-Microsoft services or Drivers can interfere with the proper functioning of System Restore. Alternatively, you could also execute a Clean Boot and see if you are able to get system restore working.
4. Run System File Checker
Run the System File Checker, i.e., Run sfc /scannow from an elevated command prompt. Reboot on completion and try now.
Read: The restore point could not be created for the following reason
5. Repair system image
Run DISM to repair a corrupted Windows System Image.
6. Run ChkDsk
Run Check Disk, by opening an elevated command prompt. Type chkdsk /f /r and hit Enter. Let the process complete and then try again.
7. Ensure that that System Restore is enabled
Make sure that System Restore is enabled on the drives where you want System Restore enabled. Right-click Computer > Properties > System Protection. Check Protection settings. To store restore points, you need at least 300 MB of free space on each hard disk that has System Protection turned on.
8. Check available disk space
Make sure that you have sufficient disk space on all the drives where System Restore is enabled.
Read: Stuck on System Restore is restoring the registry
9. Check the status of Services

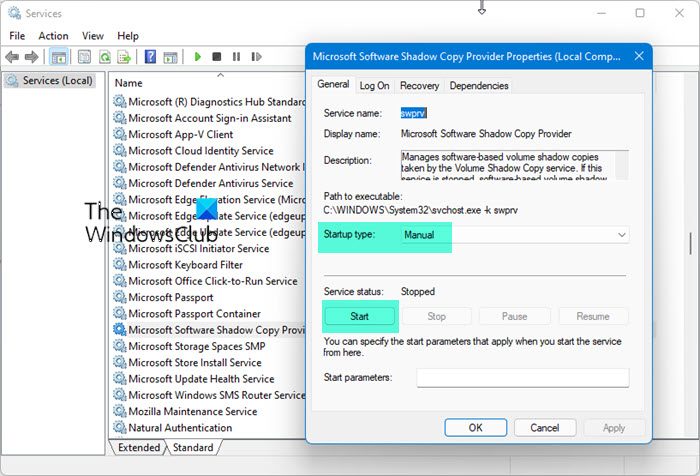
Type Services.msc in Start Menu Search Box, hit Enter. Make sure that the following Services have the following configuration:
- Volume Shadow Copy – Startup type: Manual – Service status: Running
- Task Scheduler – Startup type: Automatic – Service status: Running
- Microsoft Software Shadow Copy Provider Service – Startup type: Manual – Service status: Running
If they are not running, press the Start button to start the Service.
10. Check Event Logs
Type eventvwr.msc /s in Search Box & hit Enter to open the Event Viewer. Double-click on Applications & Services Logs and see if you are able to evaluate the event description or the cause of the problem.
11. Consult your administrator
See this post if System Restore is grayed out or System Restore tab is missing or if you receive a System Restore is disabled by your system administrator message.
Check with your system administrator if he has disabled System Restore, and if so, ask him to re-enable system restore.
12. Reset the Repository
Reset the Repository. To do so follows these steps:
- Boot into Safe Mode without networking and open a command prompt as administrator.
- Now Type
net stop winmgmtand hit Enter. - This will stop the Windows Management Instrumentation Service
- Next go to C:\Windows\System32\wbem and rename the repository folder to repositoryold
- Restart.
Again open a command prompt as administrator, type the following and hit Enter:
net stop winmgmt
Next, type the following and hit Enter:
winmgmt /resetRepository
Restart and see if you can create a System Restore Point manually.
Hope something helps.
If nothing helps, then you may use some free backup software or go in for a Refresh or Reset Windows 11/10/8 or Repair Install Windows 7.
These related posts may also interest you: