VLC Media Player contains a pack of useful features. Whatever media file you may have, VLC Player helps you to play that file. Apart from playing any file format, we also know that we can stream videos using VLC Player. Now, we are going a step forward and will use the most interesting feature of this player. We can record desktop screen using VLC Player easily. Though there are many screen recording software available, this comes in handy when you need to record the screen immediately with your installed VLC Media Player on Windows 11/10/8/7.
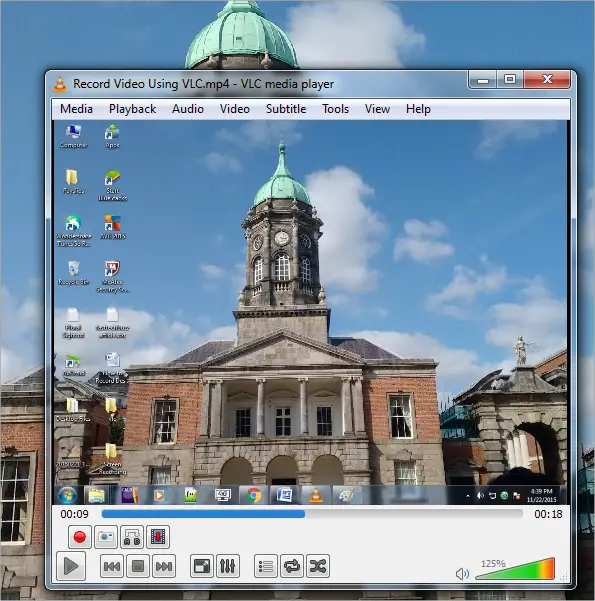
VLC Media Player allows us to record the screen to the maximum of what it can and it does so, at a good level when compared to other screen recording software. In this article, I will take you step-by-step procedure of how to record desktop screen using VLC Player easily.
Record Desktop Screen Using VLC Player
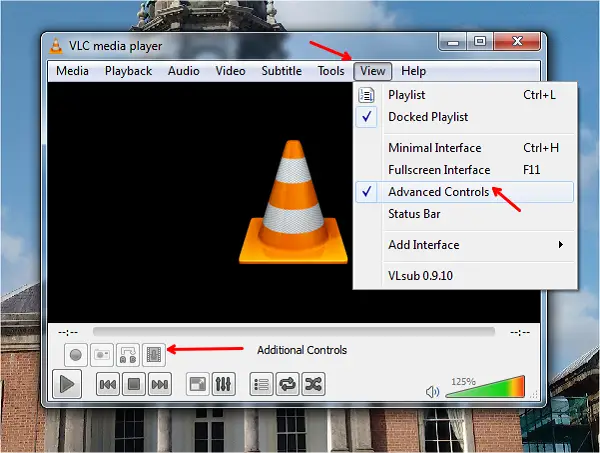
First open VLC Player and click on “View” tab and select “Advanced Controls”. Now, you can see some additional controls are being shown on the VLC Player.
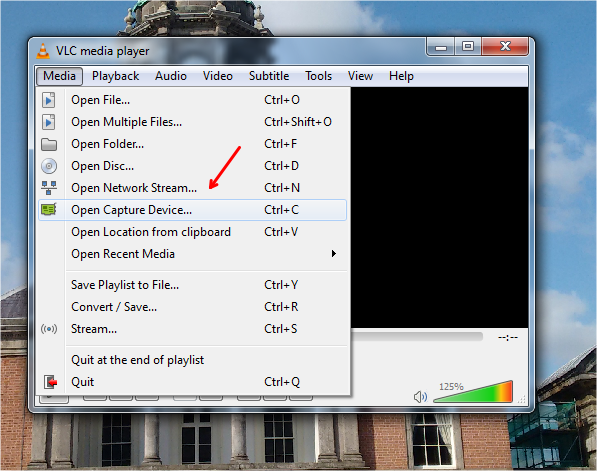
Click on “Media” and on “Open Capture Device” option.
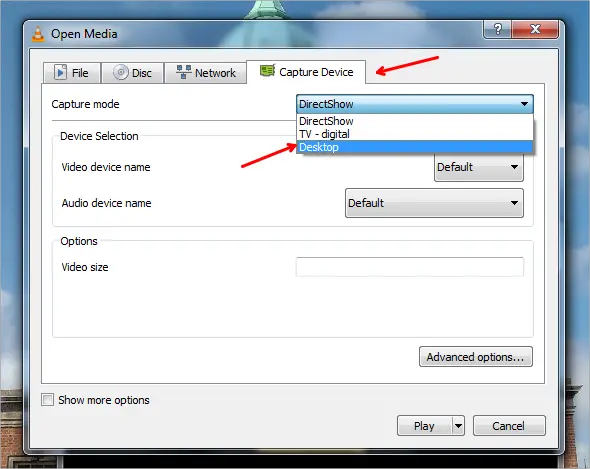
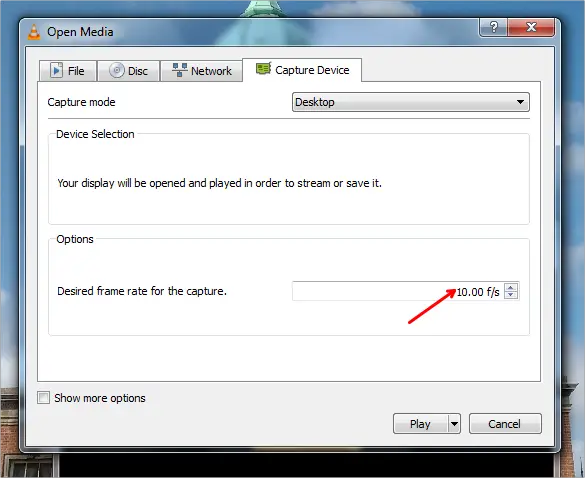
It opens “Open Media” dialog box with “Capture Device” tab being opened by default. Select “Desktop” option from the “Capture mode” dropdown box.
Set the “Desired frame rate for the capture” to 10.00 f/s.
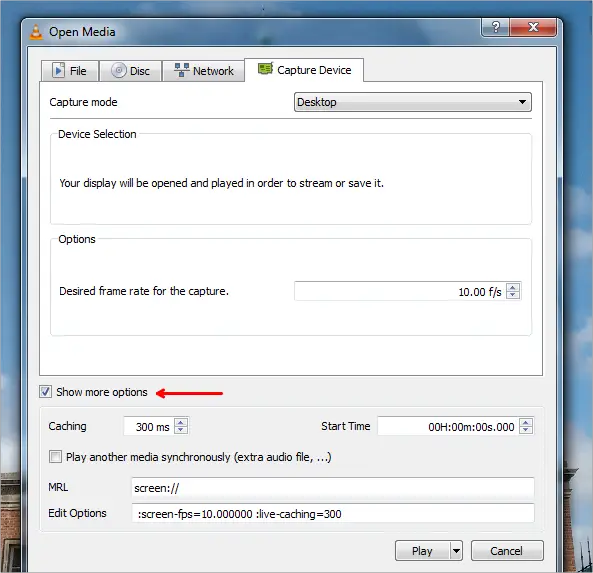
To make it clear, VLC only allows us to capture the screen and it does not record the audio or voice automatically during this activity. But, do not worry. We have an option to add the recorded voice the voice as well. Select the “Show more options” check box and you can see some more options.
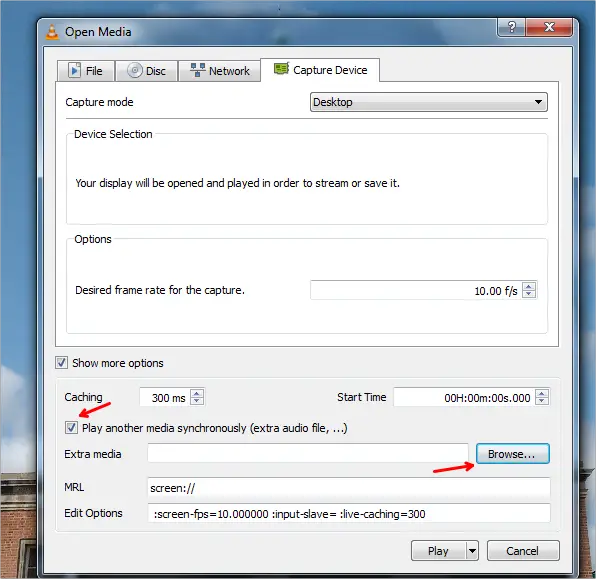
You need to record the voice before and add it. Click on “Play another media synchronously” check box and browse the audio file which has your recorded voice.
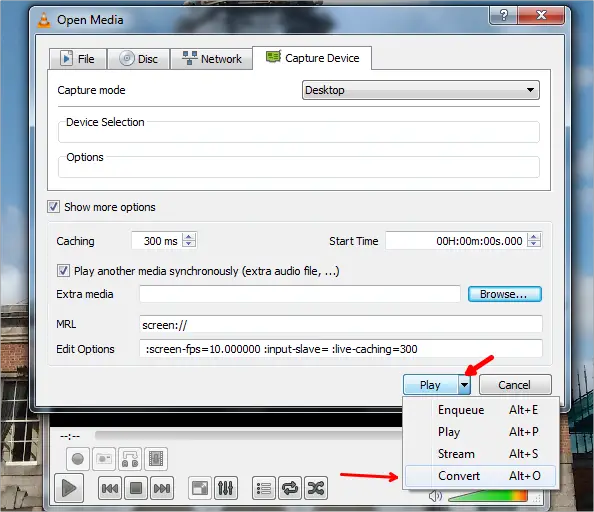
Click on the down arrow associated with the “Play” button and select “Convert”.
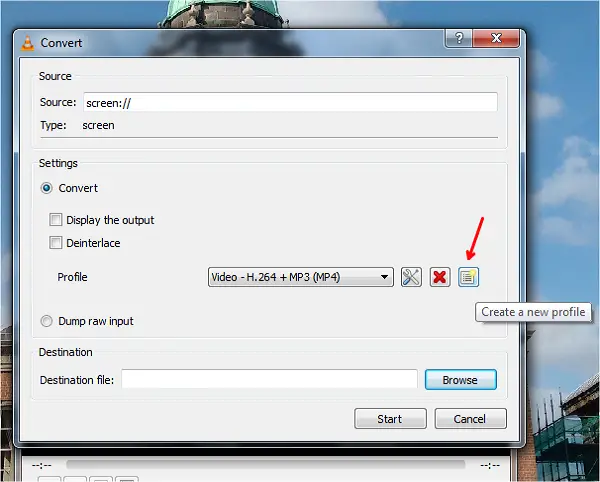
“Convert” dialog box gets opened. Click on the “Create a new profile” button.
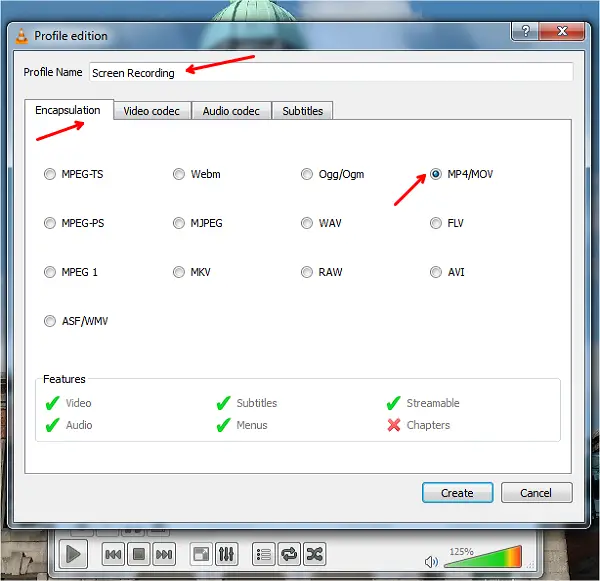
The “Profile edition” dialog box opens up with the “Encapsulation” tab being opened by default. Enter the “Profile Name” and select “MP4/MOV” radio button.
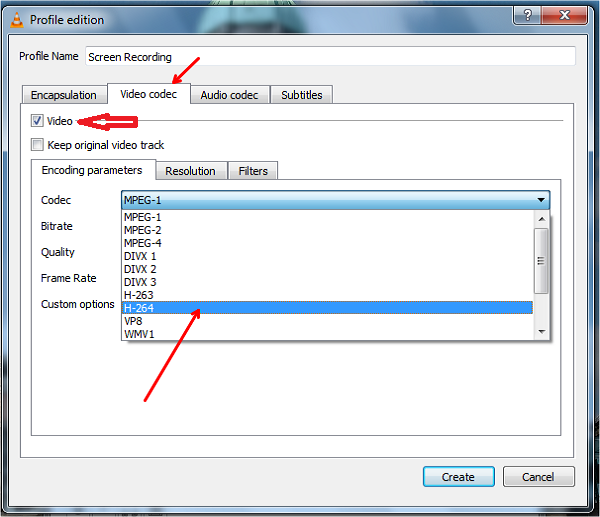
Tap on the “Video codec” tab and check the option “Video”. Under “Encoding parameters” tab, choose “H-264” option from “Codec” dropdown box and click on “Create” button.
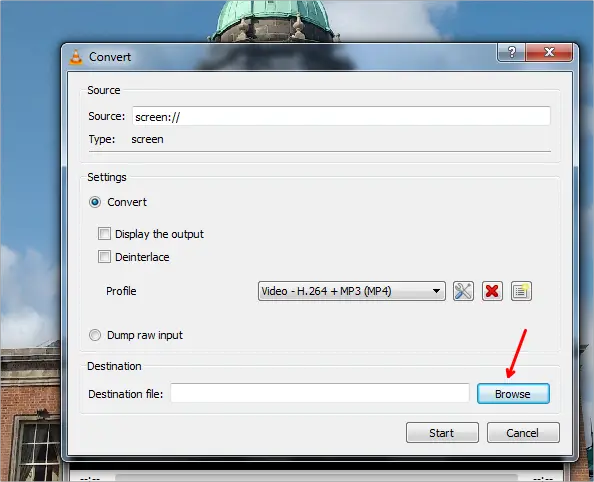
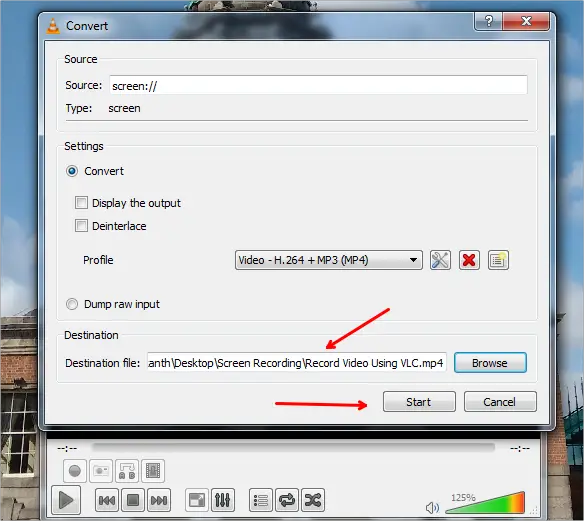
Now, you are taken back to the “Convert” dialog box and click on “Browse” to set the location of the “Destination file” to save the recorded video.
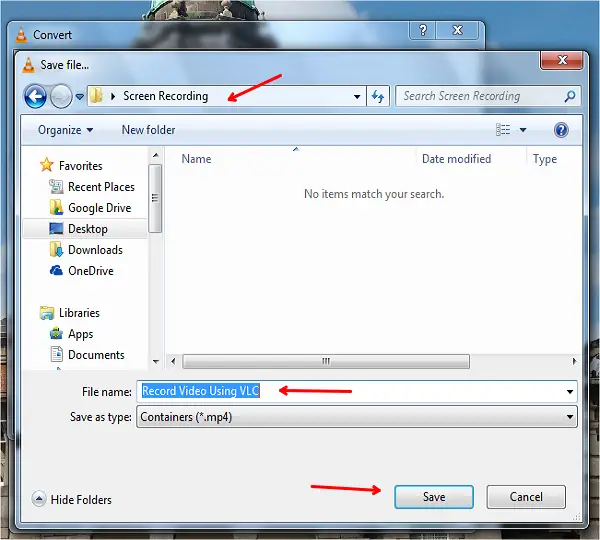
From the “Save file” dialog box, choose the destination path, enter the “File name” and hit “Save” button.
Desired destination path is shown and click on “Start” button.
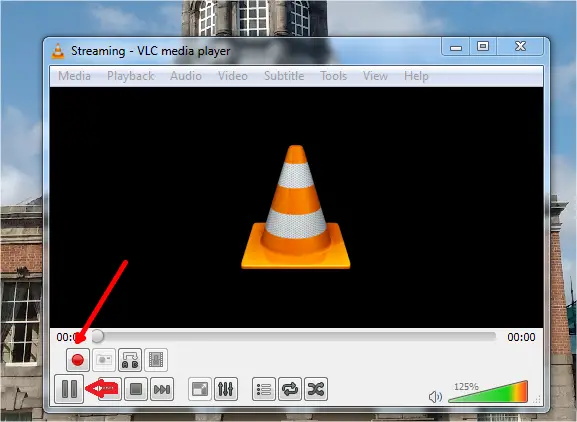
Now, whatever you are doing is being recorded by VLC Player which can be confirmed by the red colored recording button. You can pause the recording by clicking on the play button.
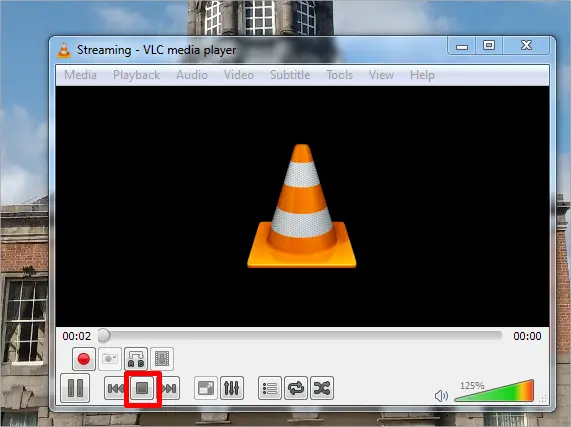
Once you are done with the recording, click on the Stop playback button.
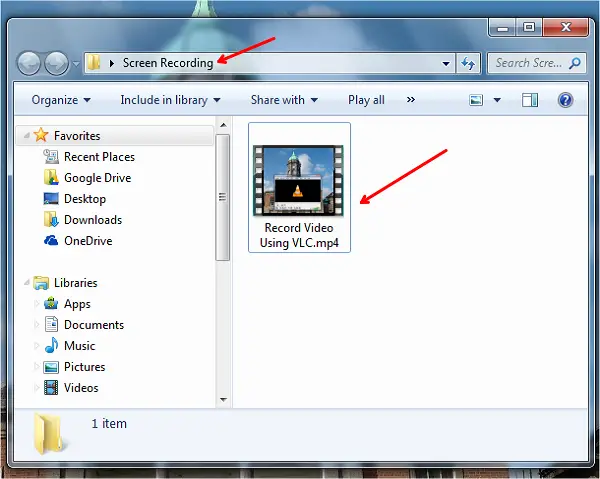
Head over to your destination folder and you could see the recorded video over there. Just double click it to start playing the video.
This is the way to record desktop screens using VLC Player on your Windows PC.