ownCloud is an open-source cloud platform that you can use to store your files. Like Google Drive and OneDrive, you can also integrate it into File Explorer by installing it on your system. In addition to this, you can also access your ownCloud server in your web browser. In this article, we will show you how to install and use ownCloud on your Windows PC.

How to install and use ownCloud on Windows PC
Let’s talk about how to install and use ownCloud on a Windows PC. ownCloud is available in both free and paid plans. The basic and free plan of ownCloud is ideal for personal use. If you want some additional features in ownCloud, you can go with their pais plans.
You can install ownCloud on your Windows PC in different ways. Previously, users were able to install ownCloud on their Windows PC via the Xampp or WampServer application. But today, the ownCloud server does not support installation on Windows via the Xampp or WampServer application and they have mentioned this on their official website.
Unfortunately, for a variety of reasons, our Microsoft Windows Server support has always been less than ideal. After much deliberation with our team, an analysis of the pros and cons of this move – we have decided to stop support for Windows as an ownCloud application server.
Now, here I will show you the following two ways to install ownCloud on a Windows PC.
- By using the Docker desktop app for Windows
- By using the ownCloud VirtualBox appliance
Before proceeding, make sure that the Virtualization technology is enabled on your system.
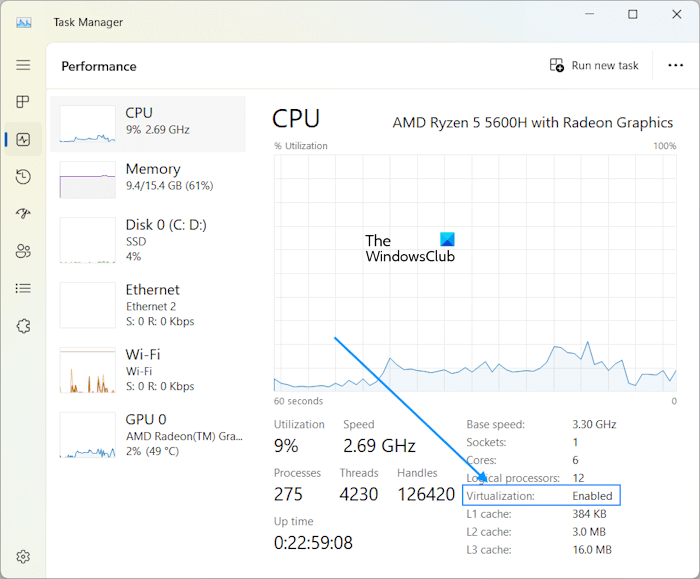
To check this, open the Task Manager and navigate to the Performance tab. Select CPU and check the status of the Virtualization. If the Virtualization is disabled, you have to enable it in your system BIOS or UEFI.
Let’s start.
1] Installing ownCloud on a Windows PC by using the Docker desktop app
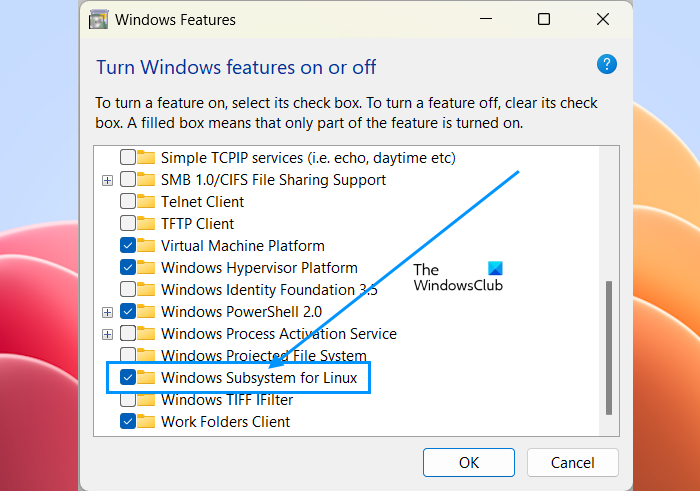
Before installing the Docker app, you have to enable Hyper-V and Windows Subsystem for Linux. Windows 11/10 Pro and Enterprise users can enable Hyper-V and Windows 11/10 Home users can enable WSL. If you have Windows 11/10 Pro or Enterprise Edition, I suggest you enable both Hyper-V and WSL. You can enable Hyper-V via Windows Features. Similarly, the option to enable WSL is also available in Windows Features. The following instructions will guide you on this:
- Open the Control Panel.
- Select Category in the View by mode.
- Select Programs > Programs and Features.
- Click on the Turn Windows features on or off link on the left side. This will open the Windows Features window.
- Now, scroll down and select the Windows Subsystem for Linux checkbox.
- Click OK.
After performing the above steps. Windows will start installing WSL on your system. This process will take some time. Do not interrupt the process.
Now, install the Docker desktop app. You can download it from the official website. Run the installer file to install the Docker desktop app on your Windows PC. You may be asked to log out after the installation is completed. If so, log out and log in again. Now, launch the Docker app.
Make sure that the Docker app is running in the background. Launch the Command prompt as an administrator.
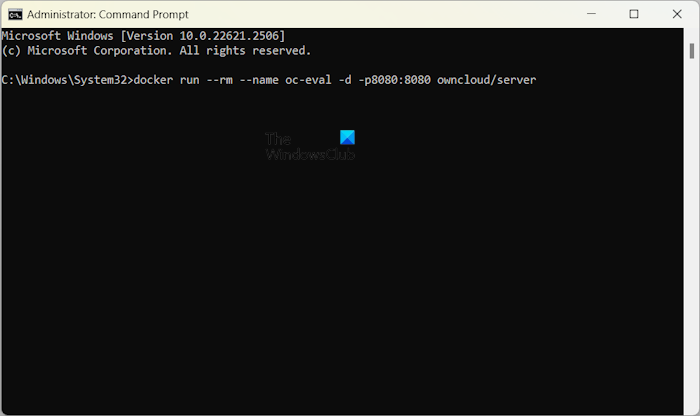
Copy the following command and paste it into the elevated Command Prompt window. After that, hit Enter.
docker run --rm --name oc-eval -d -p8080:8080 owncloud/server
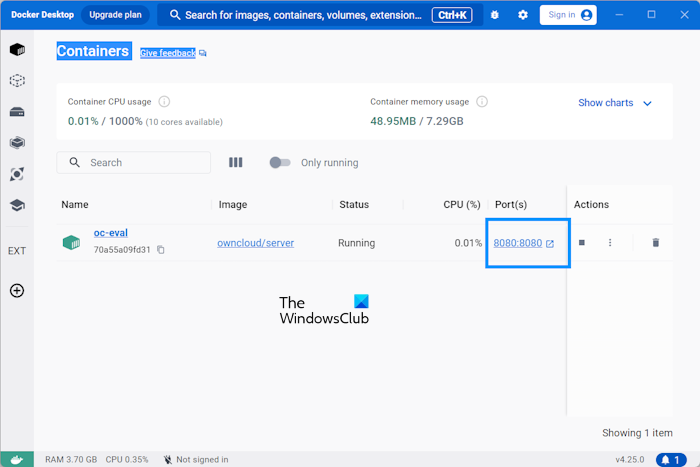
The above command will take time to execute. Wait till the command is completed successfully. After the execution of the above command, you will see a container with the name oc-eval running in the Docker desktop app. It is the ownCloud server. Now, click on the port number showing in the Docker app (refer to the above image).
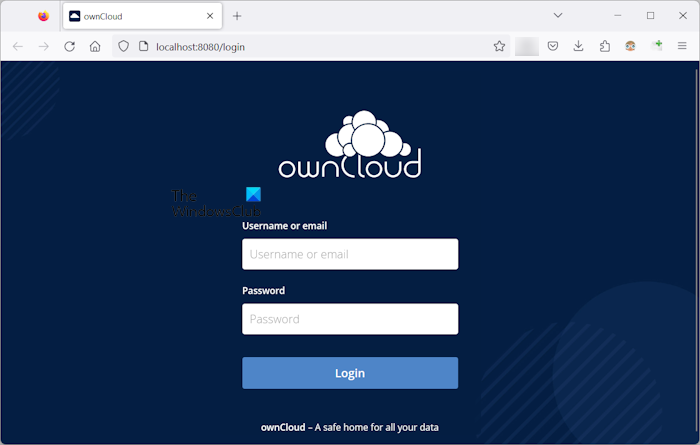
As you click on the port number in the Docker desktop app, you will be taken to the ownCloud server in your default web browser. Use admin as the default username and password to log in. Once you log in to the ownCloud server, you can change your password in settings.
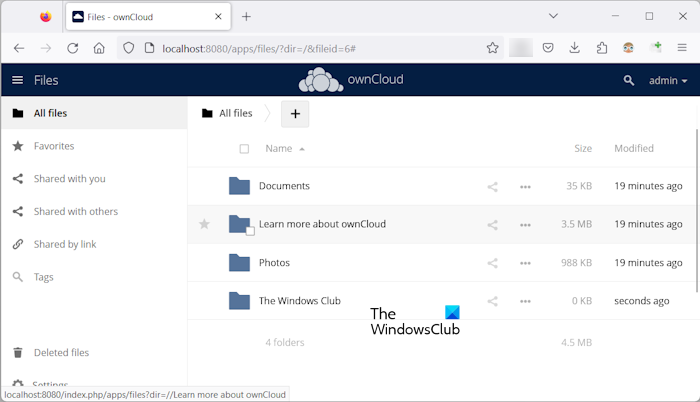
After logging in to the ownCloud server, you will see the interface as shown in the above image. Now, you can add files to the ownCloud and create new folders. If you want to integrate the ownCloud in File Explorer, you have to download and install the ownCloud desktop app on your Windows computer.
After installing the ownCloud desktop app, launch ownCloud on your PC. You will see the welcome screen where you will be asked to enter the server address. If you have set up ownCloud via the Docker desktop app, use localhost:8080 as the server address. After that, click Next.
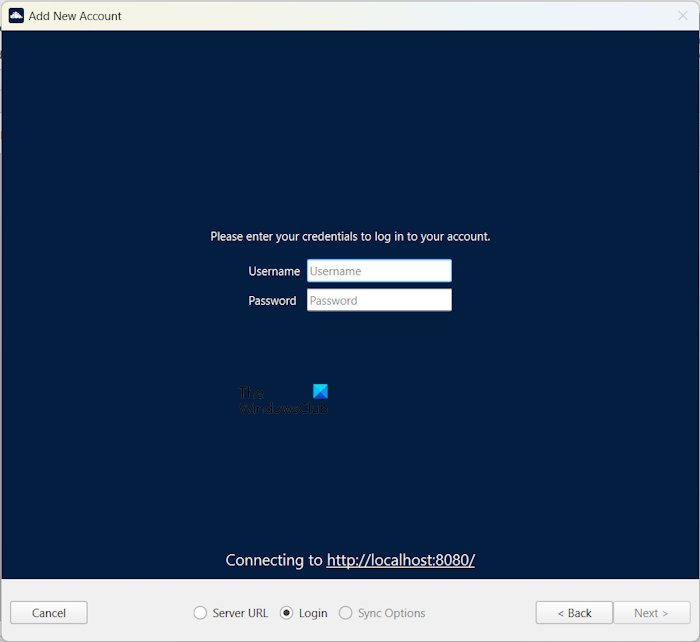
Now, you will be asked to enter the username and password. Enter the same username and password that you have used to log in to the ownCloud server in your web browser. After successfully setting up the ownCloud desktop app, you will see that ownCloud is integrated into your File Explorer.
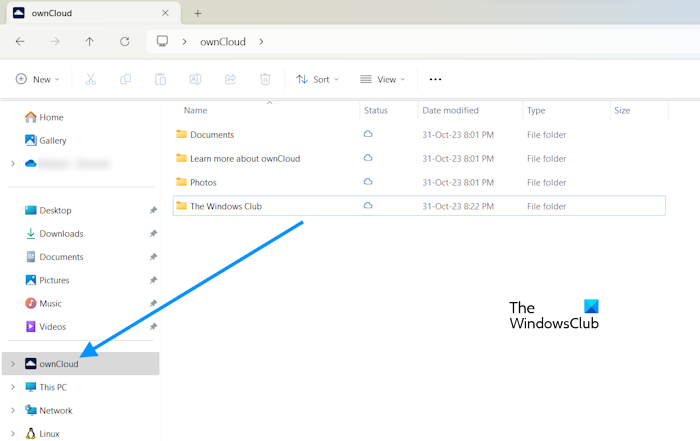
Open the File Explorer and select ownCloud from the left pane. All the files that you save on your ownCloud in File Explorer will automatically be available to the cloud because of the syncing process.
To use the ownCloud desktop app and to access the ownCloud server in your web browser, the Docker app should be running in the background.
Installing and setting up ownCloud on Windows 11/10 with Docker has one disadvantage or limitation. All the files will be removed automatically the next time you sync ownCloud. Whenever you restart or turn on your computer, you have to start the Docker app and execute the same command in the elevated Command Prompt to sync the ownCloud desktop app to the ownCloud server or to access the ownCloud server in your web browser. But when the command executes successfully, ownCloud starts a new session and deletes all your previously saved files.
This nature of ownCloud may be due to the command executed in the Command Prompt. It is also mentioned on the official website of ownCloud.
The commands and links provided in the following descriptions are intended to showcase basic docker usage, but we cannot take responsibility for their proper functioning.
I searched but did not find a fix for this issue. Hence, I tried another method to install ownCloud on my Windows 11 laptop. Windows 11/10 users can try this method.
Read: Best free secure online file sharing and storage services.
2] Installing ownCloud on a Windows PC by using the ownCloud VirtualBox appliance
This method to install and set up ownCloud on a Windows PC is also easy. For this, you have to download and install Oracle VirtualBox on your computer. Also, visit the official website of ownCloud and download the ownCloud VirtualBox appliance.
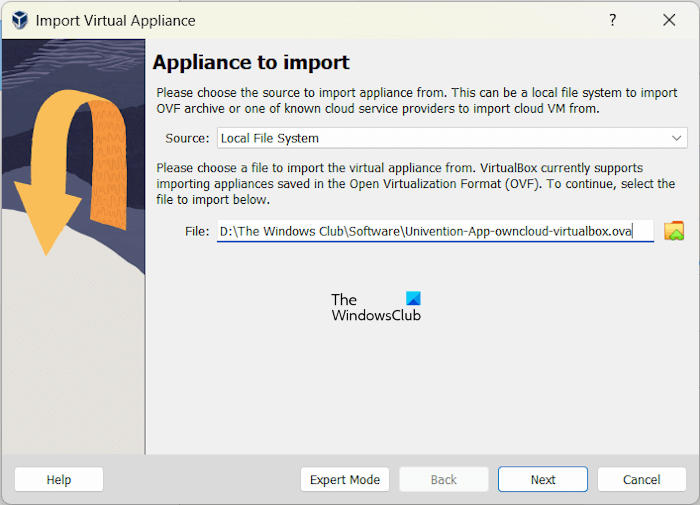
Open VirtualBox and go to File > Import Appliance or press the Ctrl + I keys. Select the ownCloud appliance file from your computer and click Next. View all the Appliance settings on the next screen and click Finish. If you want to change any setting like RAM, you can do so before clicking Finish.
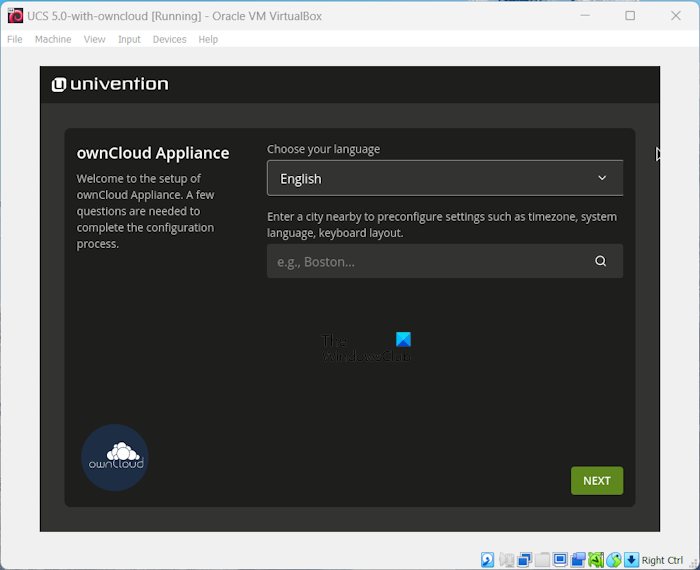
VirtualBox will take some time to add the ownCloud appliance. When the appliance is added, click Start. This will start the VirtualBox VM (Virtual Machine). Now, the ownCloud setup has begun. You have to follow the instructions in the Virtual Machine to install ownCloud properly. On the first screen, select your language and click Next.
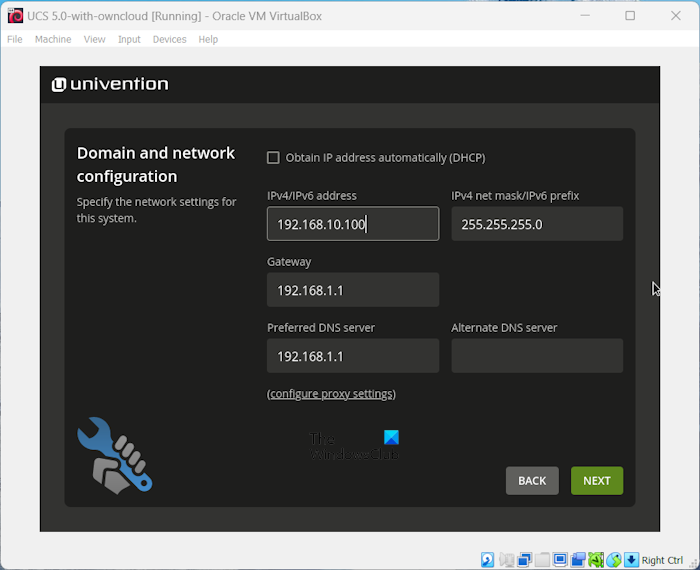
On the next screen, select the time zone and click Next. On the third screen, you have to configure the IP address. By default, it is set to “Obtain IP address automatically.” Uncheck this checkbox and enter an IP address manually. The IP address should be the one that is not being used by any of your computers connected to your network. Alternatively, you can define a static IP address on your PC and enter that IP address here. When you are done, click Next.
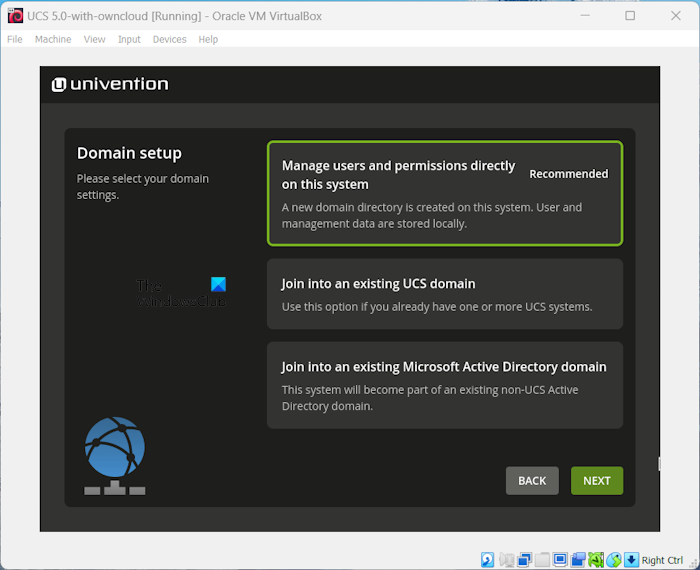
On the next screen, select the required option for Domain setup. If you do not know which option to choose, select the recommended option. Click Next to move on to the next screen.
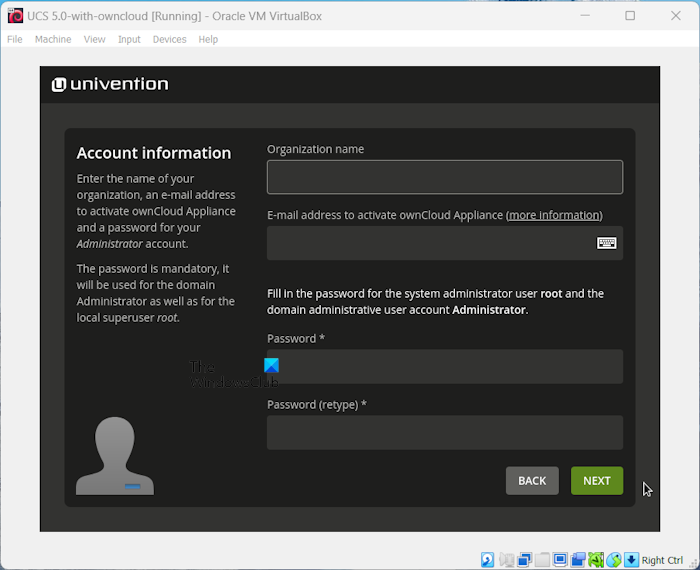
The next screen is the Account Information screen. Here, you have to enter your organization’s name. You can also use your own name in place of this. Enter your email ID. Your email address will be required at the time of ownCloud Appliance activation. Now, enter your password. Remember your password, as it will be required to log in to your ownCloud server. When you are done, click Next.
Read: Best Free Cloud-based Online Backup Services.
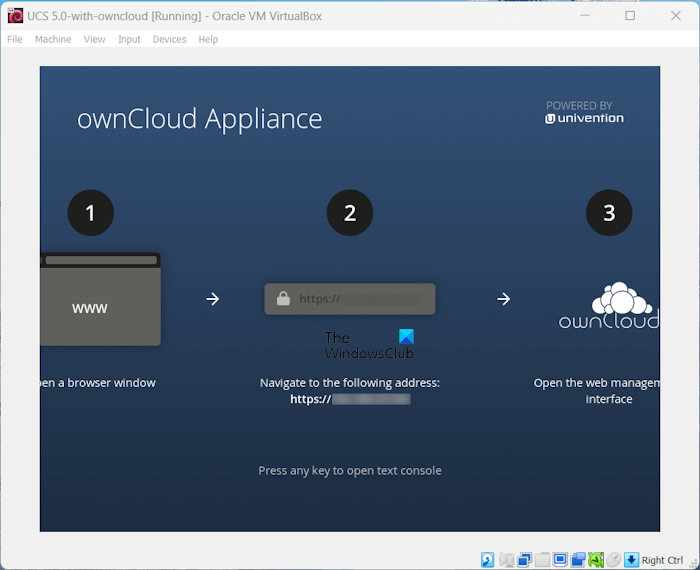
Now, the ownCloud server setup will begin. This process will take time. Therefore, you have to wait till the process gets completed. After the completion of the setup, you will see the screen shown in the above screenshot. On the last screen, you will see the steps to log in to the ownCloud server in your web browser.
- Open your web browser.
- Type https://<your IP Address>. Enter the same IP address that you used at the time of ownCloud setup on VirtualBox. This IP address is also displayed on the Virtual Machine.
- Hit Enter.
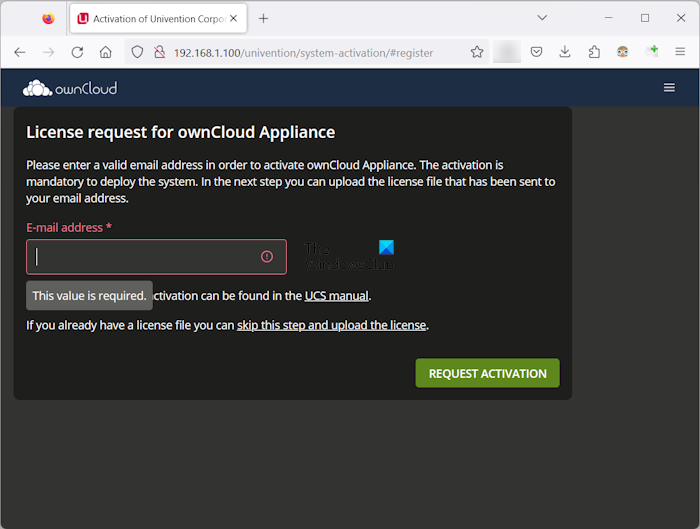
After performing the above steps, you will see the ownCloud Appliance activation screen in your web browser. Enter your email ID and click REQUEST ACTIVATION. Use the same email ID that you entered at the time of ownCloud installation in Virtual Machine.
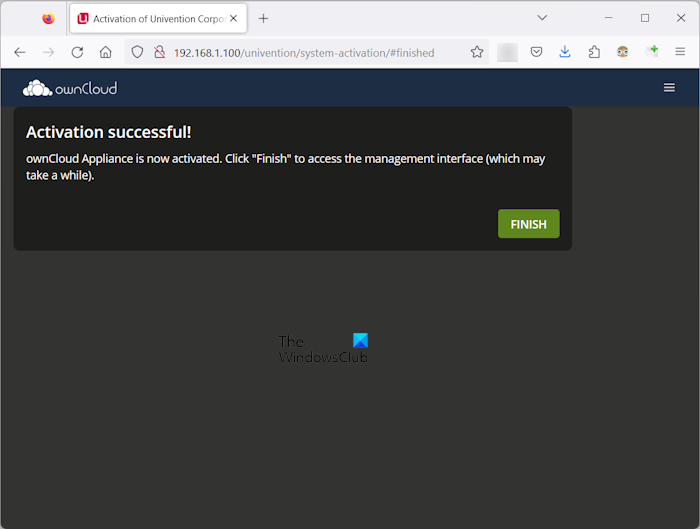
The license key will be sent to your email ID. Open your email ID and download the activation license file from there. Now, click on the UPLOAD LICENSE FILE button and select the license file from your computer. After that, you will see the Activation Successful message. Click FINISH to exit the setup.
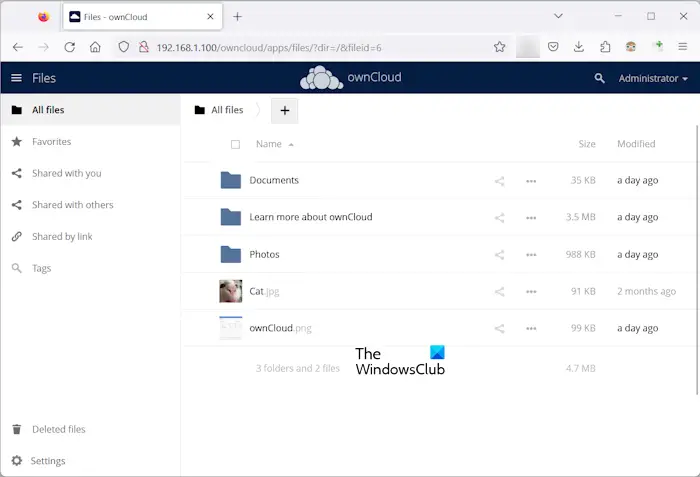
Now, you will be redirected to the login ownCloud Portal. Click ownCloud to open the ownCloud login screen. Type Administrator in the username field. Type your password in the password field. Click Login. After signing in, you will see the ownCloud interface (as shown in the above screenshot). Now, you can upload files to your ownCloud server, create new folders, upload files in folders, etc. You can also delete your files. All the deleted files will go to the Deleted files location from where you can restore them.
If you want to integrate ownCloud into your File Explorer, open the ownCloud desktop app and enter the IP address there. Click Next. But make sure that the Virtual Machine is running before integrating it into File Explorer.
You have to run the Virtual Machine every time you want to access your ownCloud server. One disadvantage that I found in this method is that this method does not work until you receive the license key on your email address.
ownCloud Invalid license key error
In my case, I received the following message after activating the ownCloud Appliance license:
Invalid license key!
Please contact your administrator or [email protected] for a new license key.
The sync between the ownCloud desktop app and the ownCloud server will also not work until the license is original. But as compared to the earlier method, your files will not be deleted automatically the next time you log in to your ownCloud server in your web browser. I am also not sure whether your files are safe or not on the ownCloud server with an invalid license key.
You can download the ownCloud desktop app from the official website of ownCloud.
That’s it. I hope this helps.
Can I install ownCloud on Windows?
Yes, you can install ownCloud on Windows. For this, you can either use the Docker desktop app or VirtualBox for Windows PC. You can also integrate ownCloud into File Explorer on your Windows PC.
Is ownCloud free to use?
It depends on your needs. Both free and paid versions of ownCloud are available. If you want additional features you have to purchase their paid plans. But if you want basic features you can go with the free plan. You can view the complete details in the Pricing section on their official website.
Read next: Best free Encrypted Cloud Storage Services.