WiFi is great because it gives freedom, and while Ethernet still dominates in delivering better speed compared to WiFi, there is nothing like sitting anywhere you wish and working or enjoying a movie. No wires! But then, when you face issues, a wired connection sounds more reliable. In this post, we will show how you can troubleshoot WiFi problems in Windows 11/10 and use it without any problem.
Fix WiFi problems in Windows 11/10
Technically, Wi-Fi adapters are different from Ethernet Adapters, but when it comes to functionality, they are both network adapters. So unless it’s a problem with the hardware, troubleshooting both is more or less the same. Here is our list of tips to fix the most common WiFi problems in Windows 11/10:
- Turn on the WiFi Adapter
- WiFi is missing from the Action Center
- WiFi doesn’t connect automatically
- Connected to WiFi, but No or Limited Internet
- Problem with wireless adapter or access point
- Low Wi-Fi signal strength on Windows
- WiFi keeps disconnecting
- Unable to find WiFi Networks
- Update WiFi Driver
Before we go ahead, there is one thing you should be sure of – There is no issue with your ISP. If that’s the case, and your WiFi adapter is working fine, then there is nothing much you can do. The best way to find it is by connecting the internet with another device.
![]()
1] Turn on WiFi Adapter
It is always a good idea to start with the basics. Just like we asked for an Ethernet adapter, it is essential to check if WiFi is turned on or not disabled. Sadly, the Windows connectivity icon doesn’t send a clear message, and hence you need to do some manual digging.
Click on the WiFi icon in the system tray, and make sure it’s not grey or dark-shaded. If that’s the case, then the adapter is turned off. If that’s the case, then you should also see a drop-down option that says Turn WiFi back on—Manually/In 1hr/4hrs/in 1day. Click on the WiFi icon to turn it on. The color should now match the accent color of the system. Lastly, click on the network you plan to connect and enter the password to complete.
Earlier, Windows used to replace the connectivity icon in the system tray with a clear message that the ethernet cable is not connected. The same applied to WiFi. Now all you get to see is a globe icon that says “Not connected – No connections are available.“
Read: Internet keeps disconnecting when playing games on PC
2] WiFi is missing from the Action Center
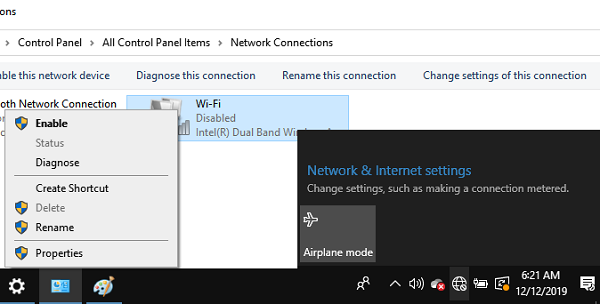
When you click on the Globe icon, and there is no option to turn on WiFi, then it’s because the WiFi Adapter has been disabled.
- Click on the Globe Icon > Network and Internet Settings > change adapter options
- Locate your WiFi adapter on the next screen, and double-click to enable it.
- To check for issues, you can right-click and choose to diagnose, which will launch the troubleshooter.
The inhouse-program will troubleshoot WiFi problems, and fix it using standard methods.
Read: WiFi option not showing in Windows 11.
3] Computer doesn’t connect to WiFi automatically
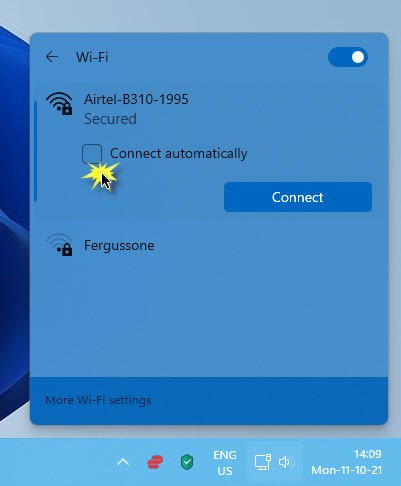
Windows 11 screenshot
Windows 10 screenshot
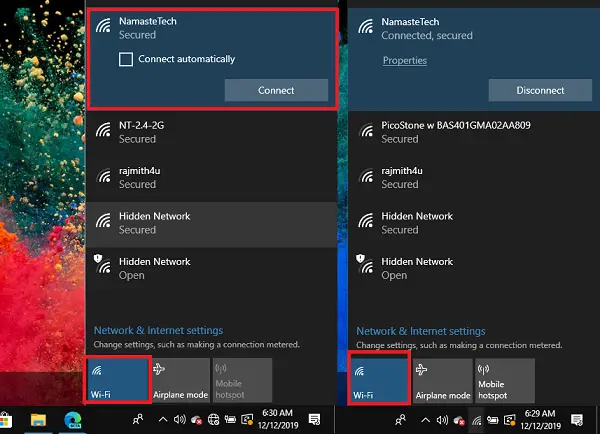
If you often connect to a network, but every time you turn on WiFi, it doesn’t connect automatically, then it’s because you need to turn on that option. When connecting to a new network, always make sure to check the box which says—connect automatically. To get the option back to the already connected network, disconnect, and then select the adapter again. The “Connect automatically” choice will reveal itself.
Read: Fix Wi-Fi Networks not showing up on Windows 11
4] Connected to WiFi, but No or Limited Internet
So now that you are using that computer is connected to WiFi, the internet is working on other devices; let’s find out how to fix it in this situation. There are usually two situations here—No Internet or Limited Internet—for the latter, follow our guide to fixing the Limited WiFi connection problem, but for the former, here is what you can do.
Troubleshooter
- Go to Settings > Windows Update and Security > Troubleshoot.
- Select Internet Connection, and then click on the button which says, “Run the troubleshooter.”
Shell Commands to troubleshoot WiFi problems
Open Command Prompt as admin, and run the following commands one after the other to flush DNS cache, reset TCP/IP and reset Winsock:
netsh winsock reset

netsh int ip reset

ipconfig /flushdns
Netsh is a command-line utility to manage network connections. While Winsock or Windows Socket decides how any program handles input/output requests for Internet applications. Hence reset may help.
ipconfig, on the other, can clear out a lot of buffers and renew the WiFi connection with the DHCP. Any of the command options can help you achieve it.
Both of these commands will refresh WiFi status, in a way, and help you troubleshoot WiFi problems.
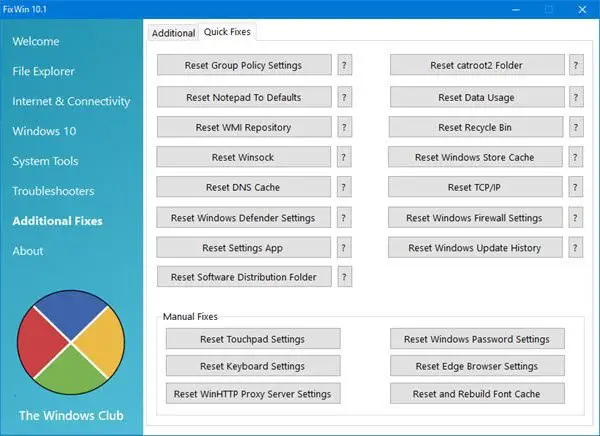
Incidentally, our portable freeware FixWin allows you to reset these and most other Windows settings or functions with a single click.
Related: Fix WiFi not working on Windows 11 – Here we have discussed what you can do if ASUS, HP, Acer, Lenovo, Dell, etc. Wi-Fi is not working.
5] Problem with wireless adapter or access point
When troubleshooting WiFi issues using Network troubleshooters, if you receive an error saying “Problem with wireless adapter or access point,” then it can be because of multiple reasons. Still, mostly, you will need to power-cycle the modem, router, and computer. At times the devices are not able to hold their state, and that causes unexpected issues.
Here is a classic example. Once in a while, I need to take out the ethernet cable from my router and plug it in. If I don’t do that, the router keeps disconnecting as if someone has turned off the power of the source.
Read: Things in your home that can block or obstruct Wi-Fi signal
6] Low Wi-Fi signal strength on Windows 11/10
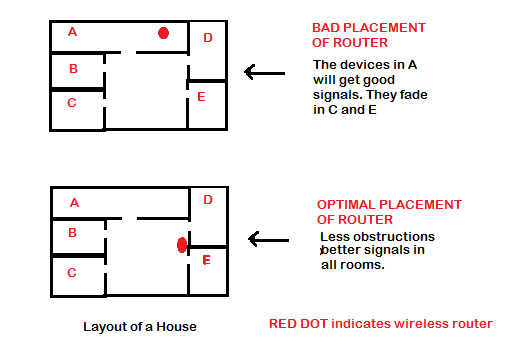
It is not an issue that is related to your WiFi adapter or Windows. Windows WiFi icon usually shows the strength of WiFi you are connected, and if it is low, then you need to move close to the source. If you own the router, and its place in your office or home, you should plan to widen the WiFi range and reach by either purchasing a powerful router or adding extenders to it. Additionally, you can think of switching to 2.4 GHz, which offers a broader range but lower strength.
Read: How to increase WiFi Speed and Signal strength and coverage area.
7] WiFi keeps disconnecting
Similar to the above issue, WiFi can keep disconnecting if the signal strength is too weak. If that’s not the case, then follow our detailed guide to fix this. It can be because the computer gets into sleep mode too early, or the VPN is using the Kill Switch to disconnect.
8] Unable to find WiFi Networks
There are two scenarios here. First is where you cannot find a particular WiFi network. Second, you are not able to see most of the WiFi network, and at times, the scan is empty.
The first case can mean that either you are not close to the range or the WiFi SSID is hidden. Many people create a network and keep it protected for security. In that case, you need to get information about the exact SSID, and then manually connect to it.
If you fall into the second category, then you may need to update your WiFi driver if the issue started occurring after a recent update or roll back the update itself.
9] Update WiFi Driver
There are a couple of ways to do this, but you may have to try to figure out what works. Drive issue usually occurs when a feature update is rolled out, and OEM hasn’t updated or included their drive with the Windows update. While the Windows team typically take care of such issue, most of the time, but its a slip then you can choose to update the driver:
- OEM website: If you bought a branded laptop, I would strongly suggest you find if they have rolled out an update
- WiFi adapter OEM: Find out the actual manufacturer of the WiFi adapter and check if they have updated to get along with the latest release of Windows.
I hope these tips to troubleshoot WiFi problems in Windows 11/10 help you fix the issue you have. It’s a broad topic, so if there is an issue that is not listed here, do let us know.