Although Microsoft Paint is an old app, its utility in performing various tasks hardly has any match. For example, you can use the app to add a transparent image over a screenshot and use it as a watermark. You don’t need to download or install expensive software for this purpose. Read this tutorial to find out how to add a transparent image over a screenshot with Microsoft Paint.
Add Transparent Image over Screenshot using Paint
While adding an inset photo into a larger background image is not so difficult, pasting the same with its background removed requires skills. Fortunately, Microsoft Paint simplifies this task to a great extent.
- Launch MS Paint on your computer.
- Open an image in Microsoft Paint.
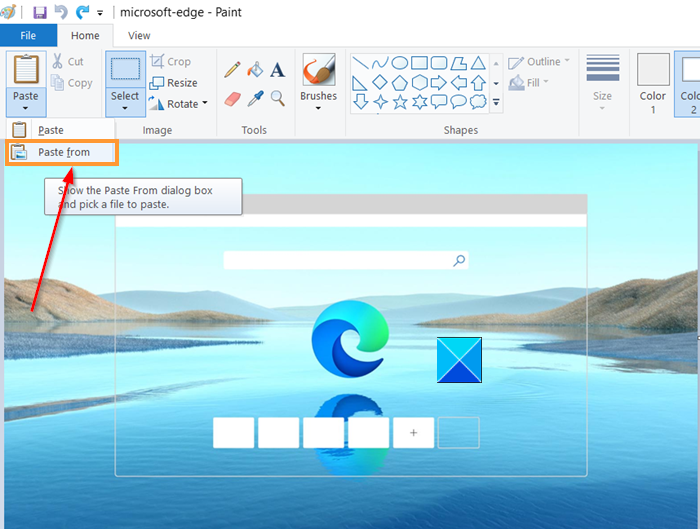
- Click Paste drop-down menu.
- Choose the ‘Paste from’
- Select the image file that you want to add over the first image.
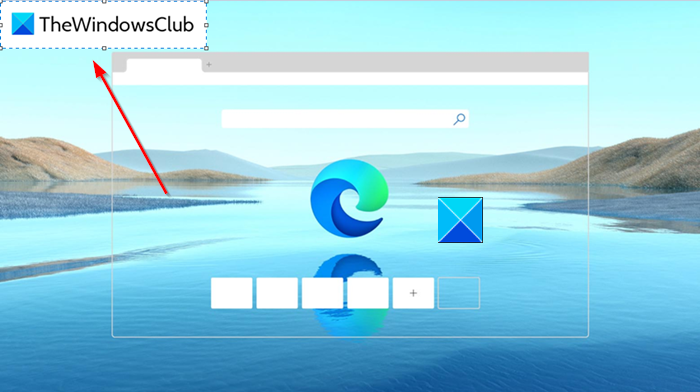
- Insert the image.
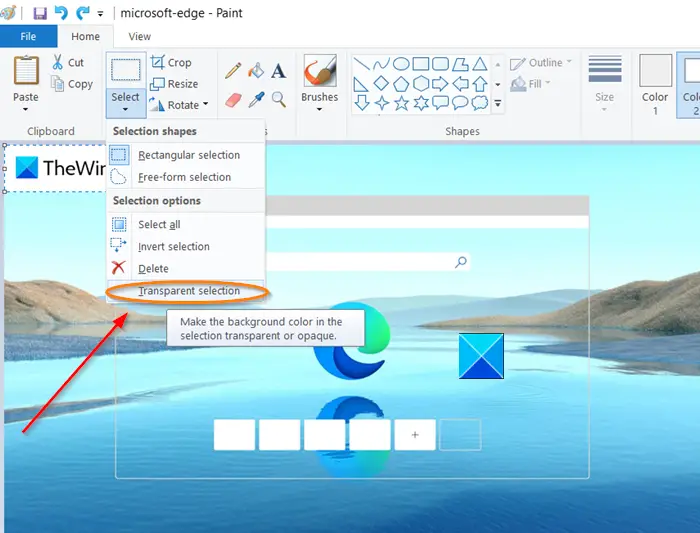
- Select Transparent selection.
Let’s see the above process in a bit detail now!
Launch Microsoft Paint application.
Select the image to which you would like to add another image via the File menu.
Click Open.

When the image is opened in the Microsoft Paint window, click the ‘Paste’ drop-down menu, and select ‘Paste from’ option.
Read: How to remove Background image with Paint 3D.
Now, navigate to the location of the image file you want to add over the first image.
Choose ‘Open’ to insert the image.

The image when added displays a solid white background. You’ll need to make it transparent.

For this, click the ‘Select’ button drop-down menu and choose ‘Transparent selection’.

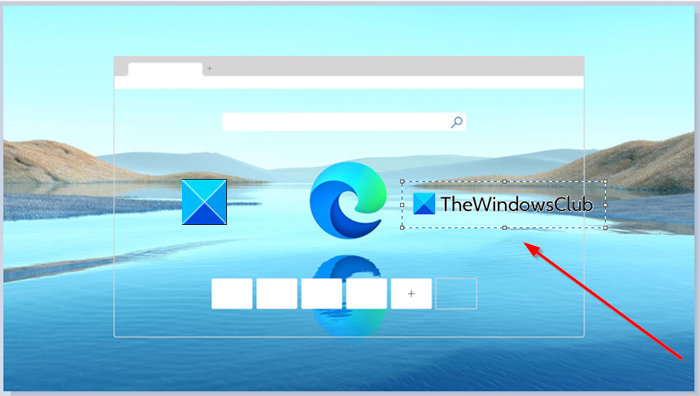
That’s it! The solid white background visible earlier should vanish instantly.
Now, to save the image, go to ‘File’, select the ‘Save as’ option, and enter a name for the file.
This way, you can easily add a transparent image over a screenshot with Microsoft Paint and turn it into a watermarked image.
Hope it helps!